
3.4. Installing the Web-CAT Submission Plug-in for Eclipse
3.4.1. Introduction
Here are instructions for how to install the Web-CAT submission plug-in for Eclipse. These instructions assume that you are running Eclipse version Oxygen.
Note: This might be a good time to also update Eclipse.
If you are running a version earlier than Oxygen, then you should
install the latest version directly.
If you are running Oxygen already, then you can check for updates at
Help --> Check for Updates.
3.4.2. Installing the Plug-in
3.4.2.1. Un-Installing an Old Plug-in
If you already have an earlier version of the Web-CAT plug-in installed, you will first need to uninstall it. For those installing it for the first time, skip to the section on Installing the Plug-In.
Open Eclipse, and in the tool bar at the top of the screen, go to
Help --> About Eclipse. Then click on the button that says
Installation Details.
After clicking on Installation Details,
a window something like this should come up:
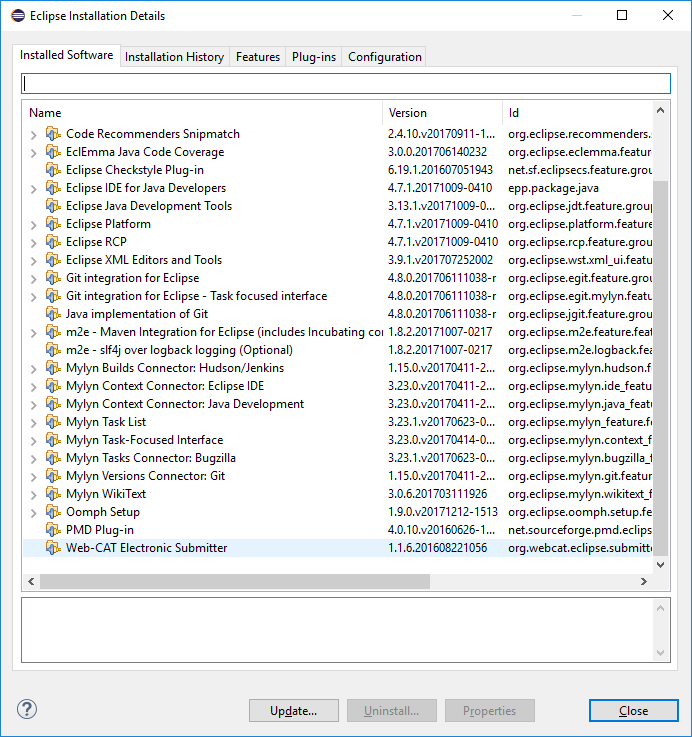
Select Web-CAT Electronic Submitter and click Uninstall.
Follow the prompts, clicking Next and Finish as appropriate,
and restart Eclipse to complete the process.
3.4.2.2. Installing the Plug-in
Open Eclipse, and in the tool bar at the top of the screen, go to
Help --> Install New Software.
The following window will come up:
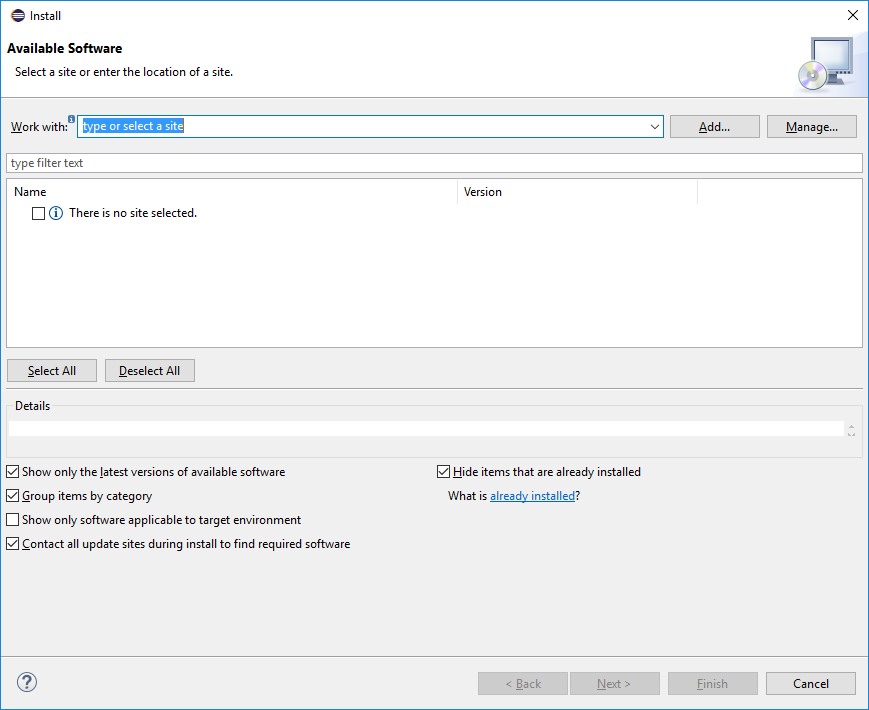
In the Work With text box, paste this link:
http://web-cat.org/eclstats
- Next, click
Add. A dialog box will pop up with two text boxes. - Make sure the above URL is in the box labeled
Location, and put in a sensible name (like "Web-CAT plugin") in the box labeledName. - Once that's done, click
OK.
This is what the window should look like now:
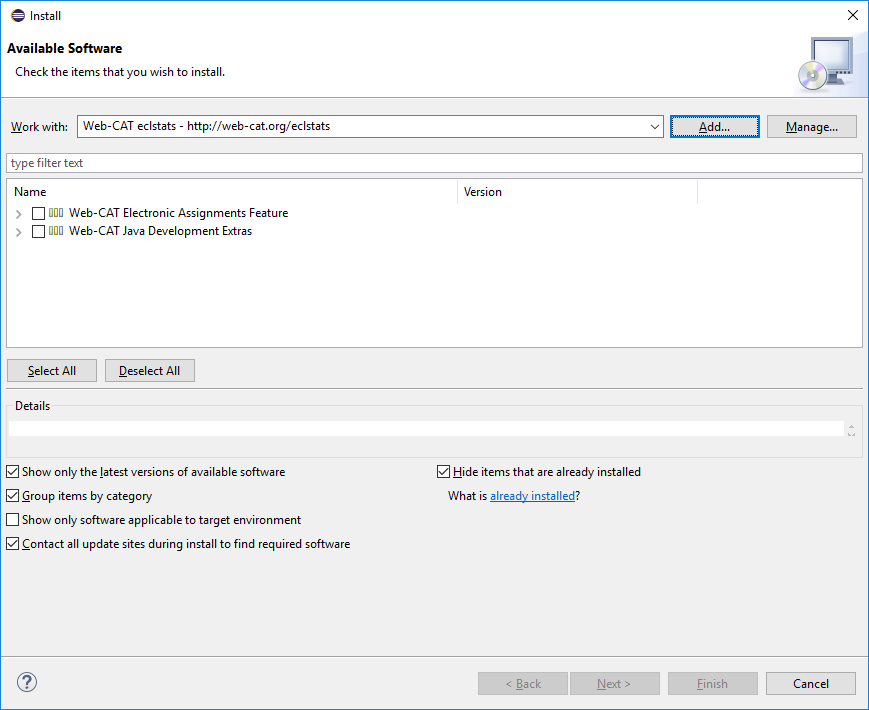
- Check the two boxes next to
Web-CAT Electronic Assignments FeatureandWeb-CAT Java Development Extras, and clickNext. - Click
Nextagain. - Click
Nextagain. - Accept the terms of the license agreement, and click 'Finish'.
The install will start now.
It will only take a few seconds, but it will pause for a moment and
warn you that you are about to install software with unsigned
content.
Click OK to continue the installation, and restart Eclipse
when prompted to complete the process.
Once you have the plug-in installed, you need to set it up to be able to communicate with Web-CAT:
- Go to
Window --> Preferences(Eclipse --> Preferenceson Mac). - In the window that comes up, in the column on the left, click on Web-CAT Assignments. You should see this window:
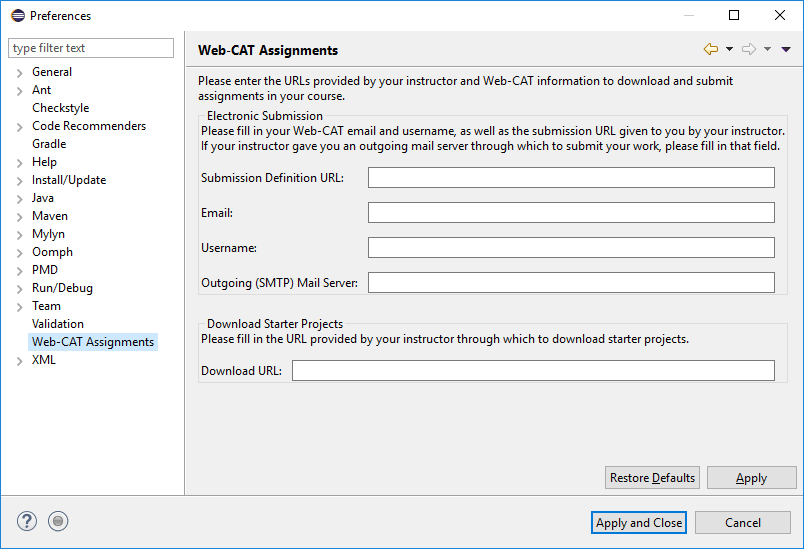
Put in the following information:
- Submission Definition URL: https://web-cat.cs.vt.edu/Web-CAT/WebObjects/Web-CAT.woa/wa/assignments/eclipse?institution=VT
- Email: Your VT email address.
- Username: Your PID.
- You can leave Outgoing SMTP Mail Server blank.
- In the
Download URLfield, enter: http://web-cat.cs.vt.edu/Web-CAT/assignments.xml - Click on
Apply and Closeto complete the process.